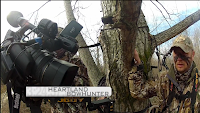
Whether you are transferring from photography stills or from a standard video camera, filming with a DSLR can be intimidating. When you shoot video with a DSLR you are manually controlling they way it is being shot. This makes a DSLR a great tool for shooting B-Roll Clips, Interviews, and other controlled shots. I wouldn't recommend bringing the DSLR into the woods with you until you have mastered filming with a DSLR, because as the animal moves in an unpredictable pattern, you must always be on your toes to control the shot. Some videographers will actually bring both their main video camera and DSLR into the tree with them just so they can film with both.

Here is a comparison video of the same shot filmed with the Sony HDR-AX2000 and the Canon EOS 60D.
Memory Cards
You are going to want to make sure that you have sufficient memory cards to record with. Memory cards that work great for storing high-resolution photos may only hold a couple of minutes of 1080 HD video. We recommend having at least a 16 GB card for recording video. Most videographers are using 32 GB and 64 GB SDHC cards. The next thing you need to look at when buying memory cards is the Class. SD cards are rated in classes depending on their transfer speed. We recommend at least a class 6 card. The higher the class the faster the transfer speed. Lower-cost cards may not be able to handle full HD video, and you can get annoying frame drop outs.
DSLR Support
A sturdy support system makes a huge difference. If you're trying to handhold while shooting video, you'll find that you end up with bouncy motion that's almost unwatchable after a few seconds. Anchor your camera on a solid tripod with a fluid head for the best results. Also, your standard ballhead, while outstanding for still capture, isn't well suited for motion unless you're going to keep the camera completely motionless. If you're thinking about any sort of panning or tilting, a proper fluid video head is important.
Once you have learned the basics of filming using a DSLR, you can use support systems such as sliders to create smooth motion.
When you're ready to shoot, you usually have a few options as far as the look the camera will generate. If you're just starting out, you may like the look of the normal image settings. Like a standard JPEG, these motion clips will have slightly enhanced color, contrast and sharpness. Once you get used to shooting motion, you'll probably change to a more muted look that will give you more options in postproduction. Don't stress too much about this at first. You're just getting your feet wet. There will be plenty of time to find a picture style that works best for you.
Your DSLR probably has several options for image resolution. It's debatable which one is best for you, and as always, there are trade-offs to choosing one resolution over another. In general, it's best to go with the highest resolution you can. So-called full HD is 1080x1920, meaning 1080 horizontal lines of resolution by 1920 vertical lines of resolution. Your HDTV set at home is probably only capable of 720 horizontal lines, so some people suggest that it's overkill to choose a higher resolution. It's a valid point, but by choosing the higher value, you're future-proofing your videos as much as possible. On some cameras, you'll see the resolution expressed as a single number followed by a "p" or an "i" (e.g., 1080p or 1080i). The letter refers to "progressive" versus "interlaced." Without delving into the technical virtues of each, you'll get the best results by selecting the highest progressive setting you can. If you have 720p and 1080i, go with 720p.
The biggest trade-off to selecting the higher resolutions we suggest is in memory. Higher resolution takes up more space faster. This is why we recommend that you always have plenty of memory card capacity. Once you're importing your video into the computer, you'll also find that higher resolution is more cumbersome to edit together and process, but as long as you have a reasonably up-to-date system and software, this really won't be a huge issue, and the higher resolution will be well worth it when you're watching the finished video. A great solution is to store your video onto external hard drives. This will free up your computer and give you more working memory.
Shooting Tips
Shooting motion isn't exactly the same as shooting stills; it helps to think a little differently. Even for motion snapshots, try to imagine the action unfolding on the screen before you shoot. Think of an establishing shot that shows the broad context, followed by a tight shot that shows the intimate detail. If possible, have some action sequences. You don't need to sketch detailed storyboards, but try to make a mental list. The variety really will pay off when you're editing things together down the line.
When it comes to the action shots, remember video should record action, not create it. Beware of doing a lot of zooming—usually no zooming is best—and keep pans and tilts smooth, steady and as minimal as possible. Let the action in the frame carry the moment.
Keep your shots short. You can control this while you're shooting, as well as in the editing process. Keep shots brief to keep your audience engaged. The next time you're watching a movie, notice how many cuts there are in just a few minutes of the movie. Keeping shots short makes for interesting video. Remember, you don't need to make something several minutes long here. A good 30-second video is much more interesting to watch than a boring 2-minute video.
-From Outdoor PhotographerTo learn more about DSLRs, check out our other blogs on them Here
Connect with Campbell Cameras on Google+


No comments:
Post a Comment