Production Elements with Tim Burnett of Team SOLO Hunters:
This video is from a blog by Tim Burnett, Team Solo Hunters on the Campbell Outdoor Challenge. This is a video of some of the production elements that go into creating the Challenge. This was shot on the recent trip for the 2011 Archery Mule Deer Challenge. To read his entire blog on his journey check it out here: SEASON of SOLO Wyoming Mule Deer Begins
-----------------------------------------------------------------------------------
Teams from the Campbell Outdoor Challenge must submit 4 different videos (3 different angles of each) incorporating an image of your team logo.
These are the shots that will end up being what we use in the show to transition from team to team. Use your imagination and most important think of creative ways to capture the shots.
It is also important to use several different video techniques amongst the different shots.
Here are some examples that I've found
From the show American Choppers:
Here is their logo
 They took the logo that was on the building and caught it's reflection in the puddle of water.
Here is the same logo but a different angle.
Here are some more examples from American Choppers

Now watch the video clips and see how fast these 5 images where put together
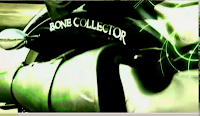
Next, we will take a look at how another show does it, Bone Collector.
Watch their show preview here
Bone Collector took a unique way to showcase their show's logo... especially since it is an outdoor show and the showed their logo on a motorcycle. It is important to think outside of the box and do things that other people in your genre aren't doing. But, remember to stay true to your audience and don't go too far away from your target.


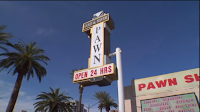
Here is some logo clips from the show Pawn Stars:
Here are some shots from American Pickers:
If you have your logo on the side of your vehicle, it is a neat shot to get video of that while driving. Be sure and take a lot of different angles of this shot as it can be used as b-roll footage.
Here are some other interesting angles for filming logos:
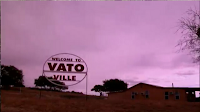
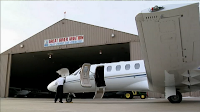

Remember to use all the other production elements when filming these clips as well. Look for creative angles, lighting, time lapse, etc. other techniques.
----------------------------------------------------------------------------------------------------------- -------------------------------------------------------------------------------------------------Production Element #4: Time Lapse
The Mountain from TSO Photography on Vimeo.
Teams in the Campbell Outdoor Challenge must provide a Time Lapse Video for one of their production elements. A time lapse video is simple in concept, and can be done several different ways, but it is important to be creative when choosing the element that you wish to focus your time lapse video on. You can make is simple or more complex, depending upon your own expertise.
How to do a basic Time Lapse:
1. It is key to have an interesting outlook or subject matter for a time lapse. Therefore, it is important to observe your environment in real time. Always make sure to note the quality of light and shadow. Now, imagine the interaction of the wind and clouds. Imagine how the light will move and how the shadows will be cast. Try to predict the subtle movement that can be captured.
2. You are going to want to choose a scene that that is captivating in the present time and that has potential to show a transformation.
examples:
 |
Neary Lagoon Santa Cruz Ca.By: Ted Tahquechi |
 |
Spider & WebBy: Ken Krueger |
Spider Time Lapse from vineet suthan on Vimeo.
 |
Stormy WeatherBy: James Lineen |
Stormy weather makes a great time lapse time, because the clouds have more volume and more depth to them. Just watch out and don't let your camera get caught in a rain storm without a rain cover or it being waterproof.
3. Stability is Key. You need a solid support to capture time lapses because stability is a necessity. This means that you need a solid Tripod or Tree Arm. The head is particularly important because you don't want to have the camera slipping during a long series.
4. Now it is time to set your camera settings. You are going to want to set your exposure manually. Remember, you are locking in the exposure to capture each scene. You want to establish the aperture setting that gives you the necessary depth of field. Typically, this means a maximum depth of field for landscapes, and a minimal depth of field for close ups. You will also want a relatively slow shutter speed, otherwise known as dragging the shutter. This will help smooth any micro movements of the camera and environment movements. Remember that you have to imagine the future when selecting your settings, and you must plan your exposure accordingly for the light changing. Neutral Density filters and Polarizer Filters can come in handy during the time lapse process.
5. Next it is important to do a little math. With a goal of a 10- to 30-second scene, you need to establish the time interval between frames. The final video will be rendered at 24 fps, therefore the amount of frames you will need to capture is 240 to 720 frames (24x10 to 24x30). With the classic example of a landscape with dramatic cloud movement, a 2-second interval may be perfect. You'll get all of your frames in 10 minutes. For shots where more passage of light is desired, many hours will be needed. Choose as tight an interval as possible balanced against your memory card or tape space.
6. Be sure that you will have a sufficient batteries/power source and memory for the duration of your time lapse. Remember, you will most likely be filming for a long time and therefore it might be hard to capture the look that you are looking for using a tape-based camera.
How to use a GoPro to film a Time Lapse:
There is two ways to capture a time lapse using the GoPro
1. Set up your GoPro on a sufficient stability source and shoot video and then in editing you can speed up the footage.
2. Use the GoPro's still image capture feature to capture 5MP digital stills. You can record at 2, 5, 10, 30, and 60 second intervals until the battery dies or the SD card fills up. This gives it a little bit of a different look.
Example:
Playing with Time from Kurt Rummel on Vimeo.
How to use a DSLR to film a Time Lapse:
You’ll need an intervalometer; this device allows you to program the number of exposures. Many DSLRs have an intervalometer built in that’s accessed through the menu settings, while others require a separate accessory. Check your camera manual to see the specifics for your DSLR.
I found this blog that turned a graphing calculator into an intervalometer!
Turn a TI Graphing Calculator into a Intervalometer
Different Time Lapse Techniques:
Camera tracking systems: You can use these "camera sliders" to create a panning movement with your time lapse:
El Cielo de Canarias / Canary sky - Tenerife from Daniel López on Vimeo.
However, those systems can cost you into the thousands of dollars. You can try searching online for some DIY blogs on how to make your own.
A good DIY tip is to use a kitchen timer and a GoPro to capture a 360º time lapse.
--------------------------------------------------------------------------------------------------
Creative Lighting
Part 3 - Production Elements
Creative lighting in and of itself is found in all examples of good photography and cinematography. Lighting has the ability to change moods and draw attention to subjects.
For this element, focus on utilizing the available light or the lack there of to draw attention to a subject. If the subject is an interesting tree, kick some dust in the air and film sun rays coming in through the leaves. A shadow of a subject could also play a role in the shot. For instance, a wide landscape shot could involve the only the hunter’s long shadow as the sun goes down. Shadows can also create lines that draw attention to your subject.
Don’t limit it to daytime shots. If you want to try something at night with artificial light, go for it.
Creative lighting at night created using a lot of Joby GorillaTorch Flare lights.
The use of a sun flare is a great technique, but be very aware of any dust on your lens.
Whatever the shot, use light to draw attention to the subject.
Check out the www.photo.net gallery for examples of great lighting and outdoor photography.
Here is a video that I ran across yesterday of the effects of IRENE in NYC. It was filmed with a Canon 7D. I am not sure which lenses where used. This shows creative lighting even in the bad weather.
Irene NYC from Buffalo Picture House on Vimeo.
Here is another video that shows not only creative lighting, but also some creative outdoor landscape and time lapse shots. We will talk more about time lapse in our next blog!
Uncommon Ideals. from Doggerland. on Vimeo.
------------------------------------------------------------------------------------------------------------
Time Code
Part 2 of the Production Elements Sequence
Time Code is a key element in any production. It is sometimes known as SMPTE code (pronounced Simp-Tee). SMPTE is an acronym for Society of Motion Picture and Television Engineers, the developers of this standard.
In video production and filmmaking, SMPTE timecode is used extensively for synchronization, and for logging and identifying material in recorded media. –WikipediaIn film production, the camera assistant will typically log the start and end timecodes of shots, and the data generated is sent to the editorial department for use in referencing those shots. Imagine what the editing process would look like when they are given a years worth of film with no reference to any of the video. They would have to sit there are go through all of the video. Timecodes provide a link between production and editing and helps move along the editing process. In film or video production, time coding is now typically done using shot-logging software running on a laptop computer that is connected to the time code generator or the camera itself.
Unfortunately, as hunters, we do not have the luxury of toting in a lot of equipment for the production of the hunts. Therefore, for outdoor videographers, time coding is done the old fashion way, pen and paper.
The SMPTE code is displayed like this:
The numbers represent:
In the example above, this means 1 hour, 5 minutes, 59 seconds, and 29 frames
SMPTE uses military time for the coding.
Hours are numbered from 00 to 23
Minutes are in increments of 00 through 59
Seconds are in increments of 00 through 59
Frames represent a single image, the smallest increment which can be cut
Every frame of video (single image) has a time reference that is recorded together with your video.
Why do you want to time code your video?
If you time code your video after you shoot, you can reference, right down to the frame, of the shots that you want to keep or delete for editing. Sometimes, if your editing process is long after your hunt, you can forget those clips that you filmed that you want to use and then you have to spend your time going through the entire footage. If you code your footage right after the hunt, then you will know about where your good clips and takes are to use. This will save you, or the editor A LOT of time!
It is really important for the teams in the Campbell Outdoor Challenge to time code their footage each day, because Aaron (the editor) has to go through all the footage to score it for the competition each day. If 10 teams give him 5 hours of footage each, without any time code, he would have to spend 50 hrs going through the footage and scoring it. That is IMPOSSIBLE to score in one night!
How to Time Code:
1. Go back and review the clips that you filmed:
The beginning (1) and the end (2) time code is located on the bottom of the screen for the high-lighted clip. A good practice is to write down the beginning and the end time code with a brief description to remind yourself or to let the editor know what that clip is.
2. While your filming, the time code is displayed on the LCD screen, typically in the top right hand corner.
Example of how to fill out the Production Elements Card for the Campbell Outdoor Challenge Events:
Professional Video cameras will generate the time code in the SMPTE format. Most of the smaller consumer cameras do not have this feature. A way that you can "code" your footage is by writing down the clip number and about the time of the "action" that you want to take from that clip. This is what you will also need to do for the POV cameras, such as the GoPro and etc. As for DSLRs, there clips are not that long and therefore you can just reference the clip number.
------------------------------------------------------------------------------------------------------------
Area/Property Reference Shots
Part 1
As a part of the challenge, teams must submit 3 cut shots referencing the area, town, county, etc. that you are hunting in.
For example of different shots that a team can get, we are going to take a look at the beginning of an American Pickers (History Channel Show). I choose this show because they travel around to new locations and meet a lot of interesting people. REMEMBER it is always best to go outside of the outdoor industry to WATCH what they are doing to get ideas and be creative yourself.
Here is the link to the video that I will be referencing in this blog : http://www.history.com/shows/american-pickers/videos/american-pickers-airstream-dream
Set up of the show: The Pickers are traveling to the middle of nowhere in Arizona to meet with these people that have stuff they might want to buy.
Examples of the cut shots of the area as the show sets the stage for the location that they are going.
1.
They start of the show by showing the two guys at there main office location and show them get into the van and head toward their destination. It is a great idea for your team to start the filming while your getting ready to head to your next hunting location, in the car on the way there and anything in between that is interesting, funny, or hurdles you have to go through (car breaks down, etc.). To get this shot the cameraman was dropped off at a location and then the van turned around and then drove by again. This quick shot lets the viewers know that they are in root to their destination.
2. Scenery shot while driving. This short clip shows the viewers that you are traveling and sets the stage for the location where you are at. This is called B-roll footage. We really don't know when this was taken during the travels, but it can be added in editing to make the show flow. If you are filming through a car window make sure that you clean the glass!
3. In the vehicle shots. This can be used by attaching a GoPro HD Motorsports HERO to the window of your vehicle. The GoPro does not pick up the best audio, and therefore the best practice would be to have your main video camera on to record the talking and then later in editing it can be dubbed over the GoPro Video.
4. Arriving to the area. When you think of Arizona, you think of dessert and cactus, etc. A great way to show that they are arriving to their location is to get a drive by shot with everything that the viewer associates with Arizona.
5. In this shot they chose a shooting location to set the stage for what they are about to do. Then it goes back to some more B-roll footage of them driving and with the voice over of them giving a background about the person they are going to go meet. In your situation you can set the stage and give the background for the property owner or guide that you are going to talk to. BEFORE YOU GO TO YOUR NEXT LOCATION be sure and do some RESEARCH on the town that you will be in. Try and set up time to talk to an important person/ interesting person that is from that town. This is a great add to the show.
6. Another driving up to the location shot. This tells the viewers that you are arriving to your next location. These shots are typically done after you have already met with the owner/person that you are talking to. Then the videographer will make you go through and drive back out and then drive in again, probably multiple times until he gets the shot that he likes.
7. The next shot is a "Panorama shot" in which the camera rotates (in this case right to left) with voice over explaining the location that they are at.
Once again, these B-roll shots are setting the stage for the viewers and allows them to feel like they are making the trip with you.
8. Remember the Rule of Thirds –This is what we would deem a creative shot. This shot utilizes natural lines. For example the top of the building (background) and the top of the tire (foreground) are aligned and placed on the top third of the grid. The dead wheat or grass is positioned in the left bottom two quadrants and the tire is situated in the bottom right quadrants. This shot is appealing to the eye.
9. Another appealing shot to show the location that the Pickers are at. Another angle to view a location and to set up a shot is from the ground looking up.
10. This another well framed shot. With the Rule of Thirds, you never want to place your subject right in the middle of the shot because that gets BORING! This was taken using a wide-angle lens. This would be a perfect shot using the GoPro HD Hero because that is a wide angle lens. Or you can attach a wide angle lens to your video camera to get these types of shots.
11. Another angle shot. Don't be afraid to ask the property owner or guide that you talk to if you can move things around to frame up the shot in an appealing matter. Remember to be respectful and ask before you start re-aranging everything.
12. I love this shot. The viewer is already sucked in and wants to know more about this crazy old lady that just stands there with a gun. In reality this lady most likely does not just stand outside her house with her gun waiting on people. Therefore, your job as a videographer and producer is to set you subject up in a way that might be a little exaggerated but that will want to make the viewer keep watching. This shot of the van pulling up to the lady tells the viewer that (1) she doesn't get many visitors(the gun), (2) that this is her property and she will defend it, (3)The pickers are going to have a hard time negotiating with this lady because she seems hard headed and likes to get what she wants. Sub-contiously these are things that go through the viewers mind and makes the show entertaining. For example, if you are going to meet up with a local war hero in the town that you are filming in, it would be a good shot to get the guy in his uniform when you are driving up to set the stage for the person you about to talk to.
13. Get the shots of you shaking hands and meeting the guide/ property owner or local person. All of these shots are going to be recreated, because obviously there is not a cameraman already there to film this meeting before you arrive.
14. After your meeting with the property owner/guide or whoever it is important to go to a different location and to talk about your meeting and first impressions, etc. This can be used in the editing process to cut in to the actual video of the meeting to set the stage of what you guys are thinking at that time. It is also important to get the audio of these talks that can be used as voice over for the B-roll shots.
15. It is important to get the person that you are talking to in front of the camera and ask them questions and have them talk about different things, so that you can throw that into the middle of the meeting or use once again for voice overs on b-roll footage.
If you watch the rest of the clip with meeting with this lady you will see how it cuts back in forth between the clips of the pickers talking, to voice overs on the b-roll footage, to the one-on-one interview, to the "live action". Now, imagine how boring the show would be if you only had the video of the "live action". The added interviews and b-roll footage help tell the story but also help move the story along in an entertaining way.
Each team will be judged on creativity and originality. The top 3 teams will be awarded points.
1st Place: 100pts
2nd Place: 75pts
3rd Place: 50pts






iphone users without flash player “CLICK HERE” to view video
The production assignment from Campbell Cameras on this element was a little vague in my opinion and I was under the understanding that it was the creative use of the knives but that is not what I saw from several of the other producers. They all set the knife sets up and took what I call “Glamour Shots” of the knives in setting that is not really hunting related at all. I guess that is the different mindset I have from many of the other typical style producers. I still think Hunt first and Film second. Maybe it is me that has things all mixed up. Who cares, I just want to produce the Solo Hunters show and videos how I want and see what the viewers have to say about it in the end. Unique is still unique at the end of the day.
I have had a lot of fun with each of the production element requirements throughout the challenge so far. It is a good idea to stretch your imagination a bit to help force yourself to improve on any given skill set. Tomorrows Element is Creative use of lighting or creative lighting use. Either way it means the same dang thing to me. Film what I see and hope that it has something creative about it. We’ll see what we end up with on that one. Goodnight all.
Tim Burnett
facebook.com/TheSoloHunter
twitter.com/solohunters
solohunterstv.com/