

Things we can learn from analyzing this video:
- 0-09 sec intro - High quality graphics & Music mix. Notice how the music and the clips go together and are in sync. The flashing sounds is in sync with the way the editor flashed the clips.
- 12-16 sec - Check out the music that goes with the graphics of the Sept. 12 and the Pat Reeve Driven Title. An entertaining way to add the titles without just overlaying them on the video. This is a theme that can be seen throughout the video
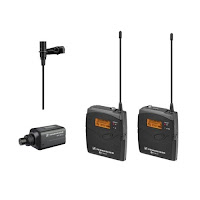
 This is a Medium Close Up Shot- from the center of the chest to the head
- Good, clean and clear audio comes from good wireless mics and a shotgun microphone. Pat Reeve uses Sennheiser EW100ENG G3-G Wireless Mics and the Sennheiser MKH416-P48 Shotgun Microphone
- 17-30 sec - Notice how the Pat's audio is a voice over on different video clips while he is talking so there isn't that long, awkward, just starring at the camera talking clip. Tip: Film Everything. You never know when you will need some "filler" clips. The editor can cut the audio out of a clip or you can do voice overs later in the studio. The scene eventually goes back to pat talking to rap it up.
- 32-38 sec- Plug your sponsor. This is a great example of plugging in one of Driven's sponsors without making it a sales pitch. Trail Camera sponsor- show the product in action with the trail camera photos that were taken in that area with that trail camera. It is important to actually use your sponsor's product. Showing these photos not only plugs the sponsor but it allows the viewers a sneak peek at what is in the area (the viewer is anticipating a good hunt and has now become attached to watching the entire video to see it play out)


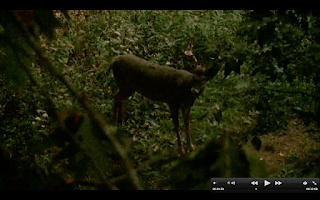
- Tip: Animals are difficult to film because, unlike actors, you can not give them direction on how to move and where to move. You can however, predict the animals movement and set up the camera frame leaving plenty of room to move. In this still shot the focus is the buck coming in from behind those trees. Pat has set up his shot giving the animal plenty of room to go the direction that he is facing. It would make a short clip and one that you would most likely have to leave out if you were to frame the deer on one the left side, when clearly that is the direction that the buck is going.

 |
| From blogger |

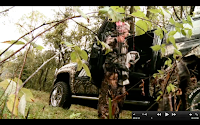 These are two interesting and different camera angles, both from below and the one of the left as though it is a "hidden" camera. Tip: Experiment with different camera angles. Don't go crazy and have a lot in your video just change it up a little to keep the audience entertained.
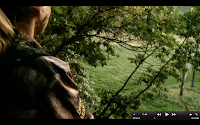 This is another good camera angle. (behind the hunter) This gives the feeling that the audience is right there with the hunter and it is like they are experiencing the same thing. It also allows the hunter to turn and face the camera and talk to the camera.
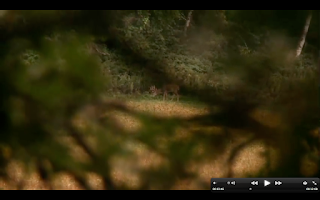
Tip: You always want to film in manual focus because in situations like this you want the camera to focus on the buck and not the tree branches in front of the camera.
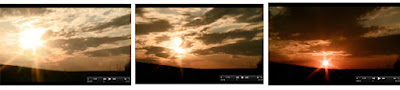
4:04- 4:07 min– This is a filming technique called a "Time Lapse" To create this is really simple. You set up a video camera on a Tripod or some other support and you just film for the duration of the event that you are trying to create. This was a clip of the sunsetting so they set up the camera a while before sunset and filmed it all the way. You then speed up the video in post production.
A lot of deer action happens in low-light situations. It is important to get a camera that is good in low-light. When looking at video cameras and their specs, you want to check out the "LUX" rating of the cameras because this is their low-light rating. There is NO standard way to rate "LUX" and therefore it can be a little tricky. Some brands label their LUX rating right out of the box, without changing any settings. Others, amp up the GAIN and then set their LUX rating there. Video Gain is where the Iris is opened up to allow more light to come into the shot. This, however, causes the film to become more grainy and pixelated. Tip: I suggest you stay on a 0 Gain, because once you increase your gain, your film will start looking amateur really fast. If it is absolutely necessary, don't go over 12 gain. No higher than 12 Gain is the Network Standards.
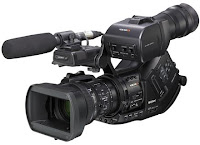
It is also important to have a good video camera. Pat Reeve is using a Professional Sony PMW-EX3
5:27 - 6:00 – The weather is a key factor when it comes to videoing outside in its elements. Under strong wind it is a necessity to have a windscreen on BOTH your shotgun microphone and you wireless mics. These windscreens with block out the wind noise so that it will not be recorded. It is also important to protect your video camera in the rain. They make several different raincovers that will most likely fit your camera. Campbell's also has two versions of Camouflage Rain Covers as options. In below freezing conditions, it is important to keep your camera warm or it will freeze up on you. Polar Mitten covers are going to be what you need if you are filming in below 30º weather.
8:12-8:40 – Watch how the music makes your heart speed up with anticipation. You are expecting the kill. The music stops in the final seconds as the hunter pulls back his bow, this is a technique that leaves the audience on the edge of the chairs waiting for it happen.
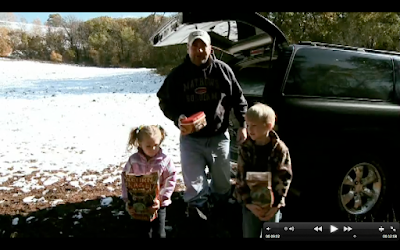
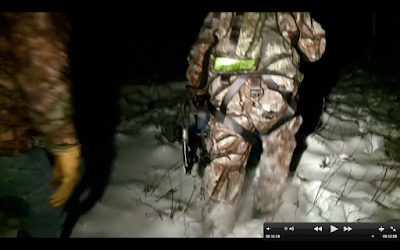
Tip: It is important to add some personal and behind the scenes footage into your video. It allows your audience to feel a connection between you and them.
9:21 – Adding a little humor to your video never hurts (unless it's not funny)
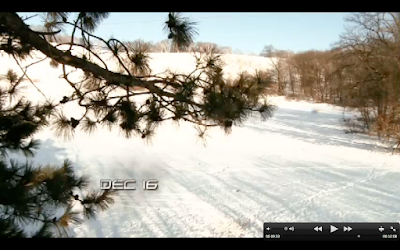
Tip: When filming in conditions where there is 1) Snow on the ground 2) Your filming by water or on water 3) around a reflective surface, you want to use a Polarizing Filter. A polarizing filter screws on on top of your lens and filters out like polarized perpendicularly to the axis of the filter. This has three applications: it reduces reflections from some surfaces, it can darken the sky and it saturates the image more by eliminating unwanted reflections.
Review "Lighting For A Recovery Shot" Blog
11:27-11:50 – Notice the difference between Pat and the Other Guy's audio levels. Pat is wearing wireless mics and the other guy is not. You can hardly hear the other guy and Pat's audio is coming in nice and clear.
Hope you learned something or at least enjoyed the video!
Leave your comments or any questions you have and we will respond. Be sure and follow our blog for updates.


How do I watch the video ???
ReplyDeleteMichael- The very first picture is actually the video. You can just click on it and watch it.
ReplyDelete