

A key production element in any video is the way that you frame the subject/s and the angle that you film them. Think about how boring it is to watch a video when the camera is on the person 100% of the time and never moves. That will not make your viewer interested. Unlike most movie and tv productions, you can not have a 4 cameraman staff out hunting with you.
So how can you create different angles with less people? There are two different ways that you can do this. One is by setting up cheaper HD quality POV or smaller handycam camcorders as second angle cameras. These cameras will create new "Live/In The Moment" angles for the editor to work with. The second one may come as a shock to you, or you might feel like it takes away from the hunt, but it is recreates. When recreates are done right and integrated into your "live" video smoothy in the editing process your viewer won't think twice about it. We know that there are some people who will be offended by this and think that it takes away from the hunt, but in reality it is helping tell all the angles of the story as well as take a viewer, who can be easily distracted, entertained.
Here are some basic terms describing how the shot is setup with your subject-
XLS-Extreme longshot; this is for capturing landscape.
LS-Longshot is for capturing the whole body
MLS-Mid longshot is for capturing the subject from waist up
MS-Mid Shot is for capturing the subject from their chest upwards
MCU-Mid closeup is for capturing the subject from shoulders upward
CU- Close up is for capturing the whole of the subjects head and face
BCU-Big closeup is used for capturing the whole face
XCU-Extreme closeup is used for capturing facial feautures and expression
Here are some basic terms describing where the camera is compared to the subject-
Low angle shots are used to make the subject seem taller and powerful
Eye level shots are used for general speech and emotion shots
High agle shots are used to make the subject seem smaller and submissive
Worms eye veiw makes the subject seem really tall and powerful
Canted shots are used for dream-like or confusing situations
Birds eye veiw makes the subject seem really small
Watch the video below and then we will discuss some different camera angles that are shown and how you can create them on a budget.
Case Study: Drop Tine Productions: Whitetail Emotions:
Camera Angles:
1. This shot is both a MLS and a MS. This tactic of employing two different shots will make your shots with two people more interesting. The camera is to the right and eye level with the subjects.

2. This shot is considered a LS because most of the subject's body is in the frame. The camera is set up eye level in front of the subject. This is a basic camera angle.

3. From the previous shot to this shot is a camera angle movement shot. The camera is zooming in while tilting down.
 How to create this shot: You are going to want to have your camera on some kind of stabilizing unit (Tripod, treearm, monopod, etc.). The key to getting that fluid like movement while tilting down (or left to right) is by using a Fluid Head. A fluid head will mounts the camera to your tripod, tree arm, monopod, etc. It is what provides that smooth movement left to right and up and down. Beginners might find it hard to zoom in and tilt down at the same time. Practice! It does get easier, we promise.
4. This shot is considered a LS because both of the subject's full bodies are in the shot. The camera is set up on a low angle.
 How to create this shot: This is not only a low camera angle LS shot but the camera is also moving forward with the subjects. This type of footage can make the viewer a) feel like they are right their with you and moving along with you or b) shaky footage like this can provoke anticipation and excitment in the viewer. This shot can be easily done with video cameras that have a handle on them. You hold the camera low and frame your subjects in the shot. This type of "movement" footage is controllably shaken to manipulate the movement of the viewer. Don't go out and just shake the camera while you move or you will turn your viewers off. This is another one that you will have to practice.
5. As the subjects continue to walk the cameraman continues this low angle movement look, but changes it to a MLS shot.

This change in shot of getting closer to the subject provokes in the viewer that they are getting closer. How to create this shot: Same way as before but frame your subject from the waist up.
6. This next shot is taken in the tree stand. There is a videographer and the hunter. The "typical" set up is that the videographer is in a stand a couple of feet above the hunter at a 90 degree angle. How did they create this mid shot?
 How to create this shot: This shot can be done by using a POV or second camera angle. The POV camera can be mounted to the tree using the EZY 2nd Op. Camera Mount and face towards the hunter. Don't think that just because you mount your POV camera to the tree that you have to keep it there! POV cameras are small enough and can mount to practically anything, use your imagination and create different camera angles that you can cut to in editing with the same camera! Let's say that big buck walks right in just as you get in your stand. Set up the hunt shots and then come back and do these shots after the hunt so you don't spook away the buck. REMEMBER your lighting settings. Don't do retakes that same day if the lighting has changed. Come back the next day and get those shots early in the day. You can edit them together in post production.
7. This next shot shows the cameraman turning on the GoPro HD Hero 2. This is setting up the GoPro to provide a mid close up shot from a high angle.


8. Animals are unpredictable. It is important to give the animal moving space when framing it. If the deer is walking forward, don't frame the deer in the bottom of the frame because if the deer moves forward he will be out of the shot. Same thing goes if the deer is walking to the left, don't frame him in the left side because he will move out of the shoot fast and it is hard to move the camera and stay focus on the deer as fast as it is moving. I would suggest keeping the deer in either half of the frames both up and down and left and right to give it a chance to move.

9. This is an example of a retake shot and a product sponsor shot. As this was integrated into the video, the viewer assumes this is all happening at one time. Most of the shots of the hunter pulling back an arrow, video of the face of the hunter as they are taking the shot is all going to be retakes. They will be taken after the hunt is recorded and edited in together to help tell the story.

10. A post production tip: It is nice to do a dual screen shot of the cameraman filming and then show what is being filmed. This can be accomplished by using a second camera angle or a POV camera.

11. This is an example of a close up with a high angle.
 How to create this shot: The camera is angled down and zoomed into the arrow which is the subject of this shot.
12. The subject of this shot is still the arrow. The angle has changed to a low angle view.
 Changing the camera angle of the subject will keep the viewers attention.
13. Interviews are usually set up depending on what the subject will be talking about. Most interviews with a single subject will be set up with a Mid shot of the subject from the chest up. You can then manipulate the camera angle and lighting to set the "tone" of the interview.
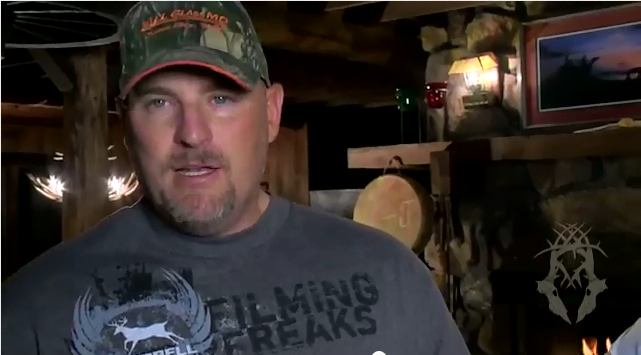 For example, when the subject is talking about something that was scary or intense you can have a close up on the subject, dark lighting setup and angled from the side looking up.
14. This is a warm's eye long shot. This allows for the cameraman and the subject to be in the frame.

With the main subject closer to the camera the viewers eye will be drawn to him, but it also shows the secondary subject (cameraman). How to create this shot: This shot was created using the GoPro HD HERO2 camera mounted on a Gorillapod on the ground. The nice thing about the GoPro is that it is a wide angle camera that will get 170 degrees in the shot.
15. This is a combination shot. The three main subjects are closer to the camera and have a mid long shot from their chest upwards and are shot at a slight low angle. The two cameraman in the background are the secondary subject. The secondary subjects are long shot with their entire bodies in the frame as well as from a low angle.
 This is a great way to frame a shot when you have a lot of people in the shot. This allows the viewer to focus on the main subject while still seeing the secondary subjects in action. In the show the Top Outdoor Producer, the hunt is filmed by the teams and a videographer for TOP is also sent along with each team to capture the recovery. This shot can still be created by framing your main subjects from the waist up and to one side and set the camera at a lower angle to be able to capture the entire bodies of the secondary subjects.
16. This is an example of a high angle shot.
 Obviously the cameraman is not 8ft tall and you can tell by the natural movement of the camera that the camerman is not up on a platform sitting still. How to create this shot: You can use a monopod to lift the camera up. This is going to give you the most stability with the camera. Another option is to use the side handle on the camera and physically lift your camera up. If you don't have the budget to add a monopod to your setup you can accomplish the same thing with your tripod but it will be bulkier and harder to maneuver.
17. This shot is a tilting shot. It starts at the ground level and tilts upwards towards the subject's face.
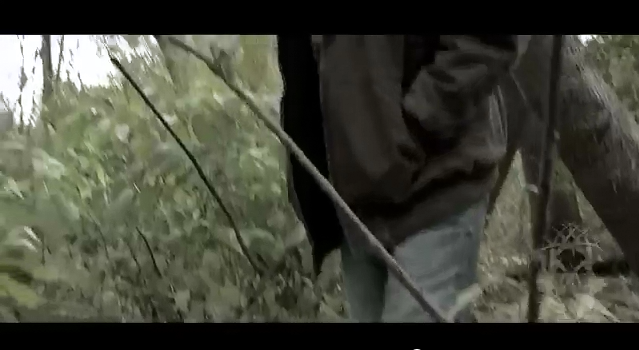 This shot is created with the camera eye level of the subjects shoes and then the camera tilts upwards. This is a shot where a handle on top of the camera comes in handy! This is a shot that you will have to practice so that you can maintain control and the right zoom settings to keep the subject in the frame.

18. This is an example of a middle long shot from behind the subjects.
 This shot will make the viewer feel like they are right there with you following you. This simple camera angle can make your audience feel apart of what your doing.
19. Recovery shots are tricky. When showing a dead animal on video and especially for TV, you can not have it covered in blood or its guts hanging out. Therefore, a lot of the shots of the subject approaching the deer and seeing it are going to be recreates. This is simply because you will need to dress the deer up and get rid of the things that would make it look gross and inhumane. A good trick is to stop your tracking and have the cameraman track it first. That way the cameraman will know when they are getting close and you can focus on the subjects face so that you can capture a true suprised/happy face. Filming a tracking/recovery can be a long process and as a cameraman you will have to tell your hunter to have patience while you go scope it out. This allows for fewer retakes.

The camera's used to film where the Sony HDR-AX2000 and the GoPro HD HERO 2
Remember when it comes to camera angles and the way to set up your shot there is no cookie cutter way to do it. Try to think about how framing your subject and the camera angle can change the mood of the shot and also how it will come across to the viewer.
I will be posting some more blogs on different camera angle's soon!
Congratulations to James Koons on his first whitetail hunt!
What do you think? We’d like to hear from you. What are your thoughts about all of the options? Leave your questions and comments in the box below.


Great tips for a novice like me. I will book mark this for future help.
ReplyDelete