


The Viewfinder

Recording Media
The Sony HXR-NX70U has 96GB of internal memory and an SD Card Slot.
1. To insert and SD Card you slide the OPEN/LOCK knob to OPEN, and then open the cover.


3. Close the cover, and then slide the OPEN/LOCK knob to LOCK.
You have a choice of recording using the internal memory or an SD card. To select where you want your footage to be recorded you :
1. Touch MENU -> [REC/Media SET] -> [Media Select]. Then the Media Select Screen Appears.

Types of Memory Cards that can be used with this camera & recording times:
Memory Stick PRO Duo media (Mark 2) = 170 min for 32GB
Memory Stick PRO HG Duo media = 170 min for 32GB
SD Memory Card (class 4 or better) = 170 min for 32GB
SDHC Memory Card (class 4 or better) = 170 min for 32GB
SDXC Memory Card (class 4 or better) = 170 min for 32GB
The minimal is Class 4 Cards, I would always recommend not going below a class 6 card.

To switch from Photo to Movie mode or from Movie to Photo mode press the MODE button on the back of the camera.
To view the photos and videos that you have recorded you can be either in Photo or Movie mode. The PLAYBACK button is located on the camera. You can then scroll through using the Touch Screen LCD to find the videos or photos you would like to playback and select them. After you have selected the movie clip and/or photo you will have the option of permanently deleting the photo or movie by touching the "trash can" icon.


 Zooming
You can magnify up to 10 times the original size with the power zoom lever. You can magnify images also with the W/F on the LCD Screen. Move the power zoom lever slightly for a slower zoom. Move it further for a faster zoom.
TIP: Be sure and keep your finger on the power zoom lever. If you move your finger off the power zoom lever, the operation sound of the power zoom lever may also be recorded.
 |
| Simulated image |

Adjusting the zoom using Manual Ring:
1. Set the ZOOM/FOCUS/IRIS switch to ZOOM:

2. Rotate the manual ring. You can zoom at the desired speed.

Adjusting the Focus
In Auto mode, when you are in a tree stand and you are trying to get the deer in focus, the camera is going to want to focus on the tree limbs and other obstacles in front of the deer. To fix this, you need to adjust the focus manually.1. During recording or standby, push the FOCUS button.

2. Set the ZOOM/FOCUS switch to FOCUS. This assigns the manual ring to FOCUS.

3. You then rotate the manual ring to adjust the focus. A mountain symbol will appear on the LCD screen when the focus cannot be adjusted any further and a person symbol will appear on the LCD screen when the focus cannot be adjusted any closer.
4. To confirm the focus setting during manual focusing you can push the EXPANDED FOCUS button to magnify the center of the screen by about 2.0 times.

Tracking FOCUS Function
The Sony NX70U has the ability to track subjects and adjust the focus along the way. To use the tracking focus function you touch your subject (person, animal, etc.) on the LCD screen and a box around it will appear and it adjust the focus automatically.Automatic FOCUS
Anytime you want to return to focusing automatically, press the Focus Button
Smile Shutter
 The camera is set to take a photo automatically when the camcorder detects the smile of a person during movie recording [Dual Capture]. An orange frame appears around a face targeted for possible smile detection shot.
EXCEPTIONS: When the frame rate and the recording mode are set to [60i]/Highest Quality FX] or [60p]/[60p Quality PS] you cannot use the Smile Shutter function while recording. Also when the frame rate is set to [24p] the Smile Shutter function does not work.
Recording High Quality Photos While Movie Recording
 You can record photos during movie recording by pressing the PHOTO button.
NightShot
When filming in total darkness or in very low light, you can use the NightShot to film using infrared lights.
To film in NightShot mode you want to take off the lens hood and any conversion lenses you have added. To change into NightShot mode you press the NIGHTSHOT button.

The image that is recorded is the Green Infrared.

Histogram


This shows the lines of brightness level set with [Zebra]. The left area on the graph shows the darker areas of the picture while the right area shows the brighter areas.
When you press the HISTOGRAM Button again and line appears on the graph and this illustrates the areas of the picture that are above the brightness level of 100.

Adjusting the Iris (light entering the shot/ depth of field)
You can manually adjust the iris to control the volume of the light entering the lens. By adjusting the iris you can change or close the aperture of the lens. Aperture is expressed as an F value between F1.8 and F9.6. The volume of light increases the more that you open the aperture (decreasing F number). Therefore at F1.8 the aperture is at its largest and the most light is coming into the shot. The volume of the light decreases the more that you close the aperture (higher F number). Therefore at F9.6 the aperture is at its smallest and there is less light coming into the shot. The F value appears on the LCD screen when in Manual Mode.
1. During recording or standby, set the AUTO/MANUAL switch to MAN (manual)


3. Set the ZOOM/FOCUS/IRIS Switch to IRIS. The Iris function is then assigned to the manual ring.


4. Adjust the Iris with the manual ring.
The range of focus, an important effect of the aperture, is called depth of field. The depth of field gets shallower as the aperture is opened (lower F number). The depth of field gets deeper as the aperture is closed (high F number). This is handy for making the background blurred or sharp. A good way to remember this is to think about how you squint your eyes to make a subject appear more in focus and sharp. When you squint your eyes, the amount of light entering your eyes is less and your "aperture" of you eye is smaller. So, when your aperture is smaller (higher F number) then more things will be sharp.
To adjust the iris automatically, press the IRIS button and the iris value disappears on the LCD screen or the symbol "A" appears next to the iris value.
Adjusting the Gain
When recording in hunting situations in dark surroundings, the camcorder will automatically increase the gain to try to get a brighter picture. However, using higher fain values will result in more noticeable video noise (grainy image). You can select the AGC limit to curb the amount of noise by setting the maximum gain value to be used. The smaller the AGC limit, the picture will be darker but will have less the noise.
If you are looking to produce a TV Show or DVDs, I would recommend you not go over 0db. However, if you are on that hunt of a lifetime and you know that within the next couple of min. you will be taking that shot of a lifetime, then you can raise the gain up a little, but you will be sacrificing the video quality.
You can adjust the gain manually when you do not want to use the Automatic Gain Control.
1. During recording or standby, set the AUTO/MANUAL switch to MAN.
2. Touch the LCD screen to display the options on the left.
3. Touch the [G/AUTO] on the LCD screen and then touch manual.

4. Select the gain value between 0db and 21db. You will notice how the image on the LCD screen gets brighter as you increase the gain, but remember, the image will take on a "grainy" look as you increase the gain. When you selected the gain that you are happy with touch the OK and then the A next to the gain value disappears, or the gain value appears on the screen.

Adjusting the Shutter Speed
Think of a camera's shutter like the shutters on a house window. It gives control over the amount of light entering the camera. In the same way that house shutters block out like until they're opened, a camera's shutter blocks out light until it's opened. The shutter button opens the shutter for a predetermined amount of time, specified by the shutter speed.
1. During Recording or standby, set the AUTO/MANUAL switch to MAN
3. Touch the [S/AUTO] and then touch MANUAL.
4. Change the shutter speed by touching the -/+

To adjust the shutter automatically, set the [shutter speed] to [auto]
Adjusting White Balance
You can adjust the color balance of the recording environment. There are four different White Balance options:
Auto: The white balance is adjusted automatically.
Outdoor: The white balance is appropriately adjusted for the following recording conditions: Outdoors, Night views, neon signs, fireworks, sunrise or sunset, and under daylight fluorescent lamps
Indoor: The white balance is appropriately adjusted for the following recording conditions: indoors, at party scenes or studio where the lighting conditions change quickly, under video lamps in a studio, or under sodium lamps or incandescent-like color lamps
One Push: The white balance is appropriately adjusted according to ambient light.
1. During recording or standby, set the AUTO/Manual switch to MAN.
2. Touch [MENU] on the LCD screen --> [Camera/Audio] ----> [Manual settings] ----> [White Balance]

3. Touch the Desired Item.
Your best bet to get the most accurate white balance is to manually set the white balance yourself. You can do this by using a piece of white paper.
1. Touch the One Push option (square with two triangle symbols)
2. Hold a piece of white paper in front of the lens in the area that you will be filming.
3. Touch the [SET] on the screen.
4. The white balance is manually set for that area of filming.
Once you change shooting locations, you will want to adjust your white balance for that new location.

AUDIO
To use external microphones utilizing the XLR ports the handle must be attached to the camera. Remember that the camera is not "rainproof" with the handle and shotgun microphone attached.
Attaching the Handle:
1. Attach the handle to the shoe of the camera by sliding it forward.

2. Tighten the screw of the XLR Adaptor.

3. Connect the plug of the XLR Adaptor to the Active Interface Shoe of the Camcorder.

4. Unlock the stopper of the microphone holder and open the cover

5. Alight the convex part of the microphone with the concave part of the holder, and then place the microphone into the holder. Close the cover and lock the stopper securely.
Then connect the plug of the microphone to the INPUT1 jack.

6. Set the [REC CH Select] to CH1•CH2 to use both channels, or CH1 INPUT1 to record audio on from CH1. If using the included shotgun microphone, set the ATT to 10db and the INPUT1 to MIC+48V.
To Reduce wind noise adjust the INPUT1 of the LOW CUT to ON
To Manually Control the sound level of the microphone switch it from AUTO to MAN.

To guarantee the audio is being recorded the way that you intended it to it is important to monitor the audio levels using headphones and/or the audio meter.
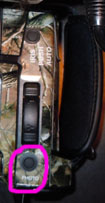
The headphone port is located on the back of the camera.

To show the audio meters on the LCD screen touch [MENU] ---> [camera audio] --> [shooting assist] ---> [Audio Level Display] --> Select [on] --> The audio meter for channel 1 and channel 2 are displayed in the bottom right hand of the LCD screen.

You can select the HD Audio Format from [Linear PCM] or [Dolby Digital] when recording in high definition image quality by touching [MENU] --> [camera audio] --> [audio] --> [audio format] --> select either [linear PCM] or [Dolby Digital]

LPCM has been defined as a part of the DVD (since 1995) and Blu-ray (since 2006) standards. It is also defined as a part of various digital video and audio storage formats (e.g. DV since 1995, AVCHD since 2006). Linear pulse-code modulation is used by HDMI, a single-cable digital audio/video connector interface for transmitting uncompressed digital data.
Dolby Digital is the common version containing up to six discrete channels of sound and should be used when using multiple channels or sound.
Selecting the Frame Rate and Recording Mode
You can select the frame rate to be used to record HD image quality movies. Using [60i] is recommended for standard recordings.
1. Touch [MENU] --> [REC/Media Set] --> [Frame Rate] --> Touch the desired setting.

60p: 59.94 progressive
60i: 59.94 interlace
24p: 23.98 progressive
60i (actually 59.94, or 60 x 1000/1001 to be more precise; 60 interlaced fields = 30 frames) is an interlaced format and is the standard video field rate per second for NTSC television (e.g. in the US), whether from a broadcast signal, DVD, or home camcorder.
60p is a progressive format and is used in high-end HDTV systems. While it is not technically part of the ATSC or DVB broadcast standards, it is rapidly gaining ground in the areas of set-top boxes and video recordings.
24p is a progressive format and is now widely adopted by those planning on transferring a video signal to film. Film and video makers use 24p even if their productions are not going to be transferred to film, simply because of the on-screen "look" of the (low) frame rate which matches native film.
2. After you select the frame rate that you wish to film at you can press [NEXT] and that will bring you to the record modes available according to the frame rate you selected.

The recording time of the recording media is changed depending on the recording mode.
• Movies are recorded with the 1920 x 1080/60p format when the PS mode of high definition image quality is selected, and with AVCHD 1920x 1080/60i or 1920 x 1080/24p format when the FX or FH mode is selected. When the HQ or LP mode of high definition image quality is selected, moves are recorded with AVCHD 1440x1080/60i format.
• If you are looking to make Blue Ray Discs you must select either FX or FH/HQ/LP recording mode.
About this tutorial:
This is a © Copyrighted Blog, pictures and information from Canon and Campbell Cameras and should not be used without their permission, by email Johanna@Campbelloutdoorchallenge.com, by phone: 618-382-7939 or by mail:
Campbell Cameras
Attn: Johanna Campbell
1327 Co. Rd. 800 N.
Carmi, IL 62821


Thanks so much! This was really helpful in figuring everything out with my new camera, you are an absolute lifesaver! : )
ReplyDeletegood job. thanks
ReplyDeleteIs this camecorder compatible with imovie
ReplyDeleteI getting this camecorder as a gift just want to know if it is compatible with imovie or do i need a converter?
ReplyDeleteplease let me know
This camera is compatible with iMovie. iMovie edits in 30fps, so you can film in 30fps if you like.
ReplyDeleteOK thank you I got it today can't wait to use it
ReplyDeleteLet me know if you have any other questions!
ReplyDeleteI will and thank you so much have a Merry Christmas.
ReplyDelete