In the outdoor industry interviews are usually conducted in a way that you don't see the interviewer at all, and sometimes there might not be one. What I mean by "interviews" in this blog is going to refer to the shots you see of just one character talking to the camera and multiple characters talking to the camera without actually seeing an interviewer.
For this blog we are going to use this "Last Bite clip from Drury Outdoors' Wildlife Obsession"
Interviews are usually best shot in these following compositions:
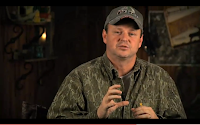
Medium Shots - From the waist to the head
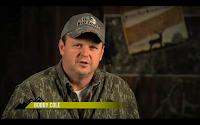
Medium Close-Up Shots - From the center of the chest to the head.
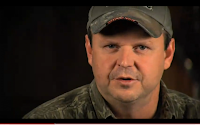
Simi Close Up Shots - From the shoulders to the head.
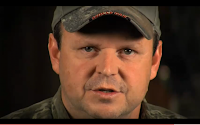
Close Up Shots - Only the head and face
Wide Shots are not typically used for interviewing purposes because they tend to show a lot of space and take the emphasis off of the person being interviewed. In some cases, however, wide shots are necessary to use when there is something of importance in the background and you can not frame the shot any other way.
Framing your shots for multiple interviewees is a little bit different then with a single person. For multiple interviewees lets take a look at the Trailer for the Campbell Outdoor Challenge
Two Shot- The shot is framed in a way that is shows the subjects in more detail while still giving the impression of the entire subjects.
Medium Shot- This shot is framed for showing the subjects waist to their head. In this shot, you can tell that the emphasis is on the person talking on the left. This is a way to show emphasis on one person but not losing the 2nd person.
Medium Close Up Shot- When filming two or more subjects the situation might call for the frame to be focused on one of the subjects. An example for this case would be when the person 1 is talking about something emotional/dramatic (talking about how they missed that opportunity), etc. and the videographer wants to capture that emotion. The closer-up shots typically reveal more emotion then the wider angle shots.
In addition to the interview itself, it is important to get other shots that the editor can cut in over the Interviewee's voice. These are known as B-Roll shots. This allows the audience to see a visual of what the interview is about and it also makes it more entertaining and less awkward than just having a person talk and look into the camera.
Examples of B-Roll shots:
If you have the ability to use a multiple cameras for an interview you can create more for the editor to work with. Cutaways: usually close-up shots recorded with a second camera. These shots are going to isolate details about the interviewee, such has facial expressions, hand movements, etc.
Here are some examples from the Campbell Outdoor Challenge Archery Qualifier Trailer of shots captured using second camera angles:
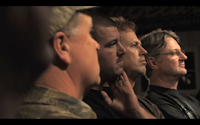
Anytime you get the opportunity to use multiple cameras in one shot, it will allow you to get different takes on different angles and gives the editor a lot more to work with. It also makes a show more interesting then just one camera. Your second camera does not have to be an expensive one, it can be anything from the GoPro HERO HD, Kodak Playsport, or one of the small Handycam camcorders. These all film in HD and when stabilized by a tripod will capture the video you need for those second angle shots.
It is always a good idea in post-production to add a graphic banner along the bottom of the screen for part of the interview that gives the audience and idea of who this person is (Name, Team Name, ... etc.)
In a previous post we discussed the element of "Lighting", this is a good post to review yourself on to help with lighting an interview. Also here are some videos from Lights Film School on lighting:


Great article about interviews. I'm excited to try some of these techniques this spring.
ReplyDelete